DIY Landscaping - Front Yard Makeover on a Budget
Learn step by step how to design and layout a beautiful landscape on a budget and increase your curb appeal. For this project, we designed and overhauled our front yard landscape for right under $950. Quality over quantity was our focus and we purchased an amazing Fat Albert - Blue Spruce and some other beautiful plants.
Watch the video to see our landscape makeover before and after
Step 1 - Draw A Rough Design Using Curved Lines
It's important to have a rough idea of what your site plan looks like. Draw large landscape beds with interesting curves. The larger landscape beds will allow you to have less water-hungry grass and that's less to mow. Secondly having larger beds allows you to create more depth which will give your landscape more character and dimension. Also, keep in mind that a landscape that has mini hills throughout also creates more interest and dimension. Consider keeping hills or even adding new hills for some of your focal plants for the vertical dimension.
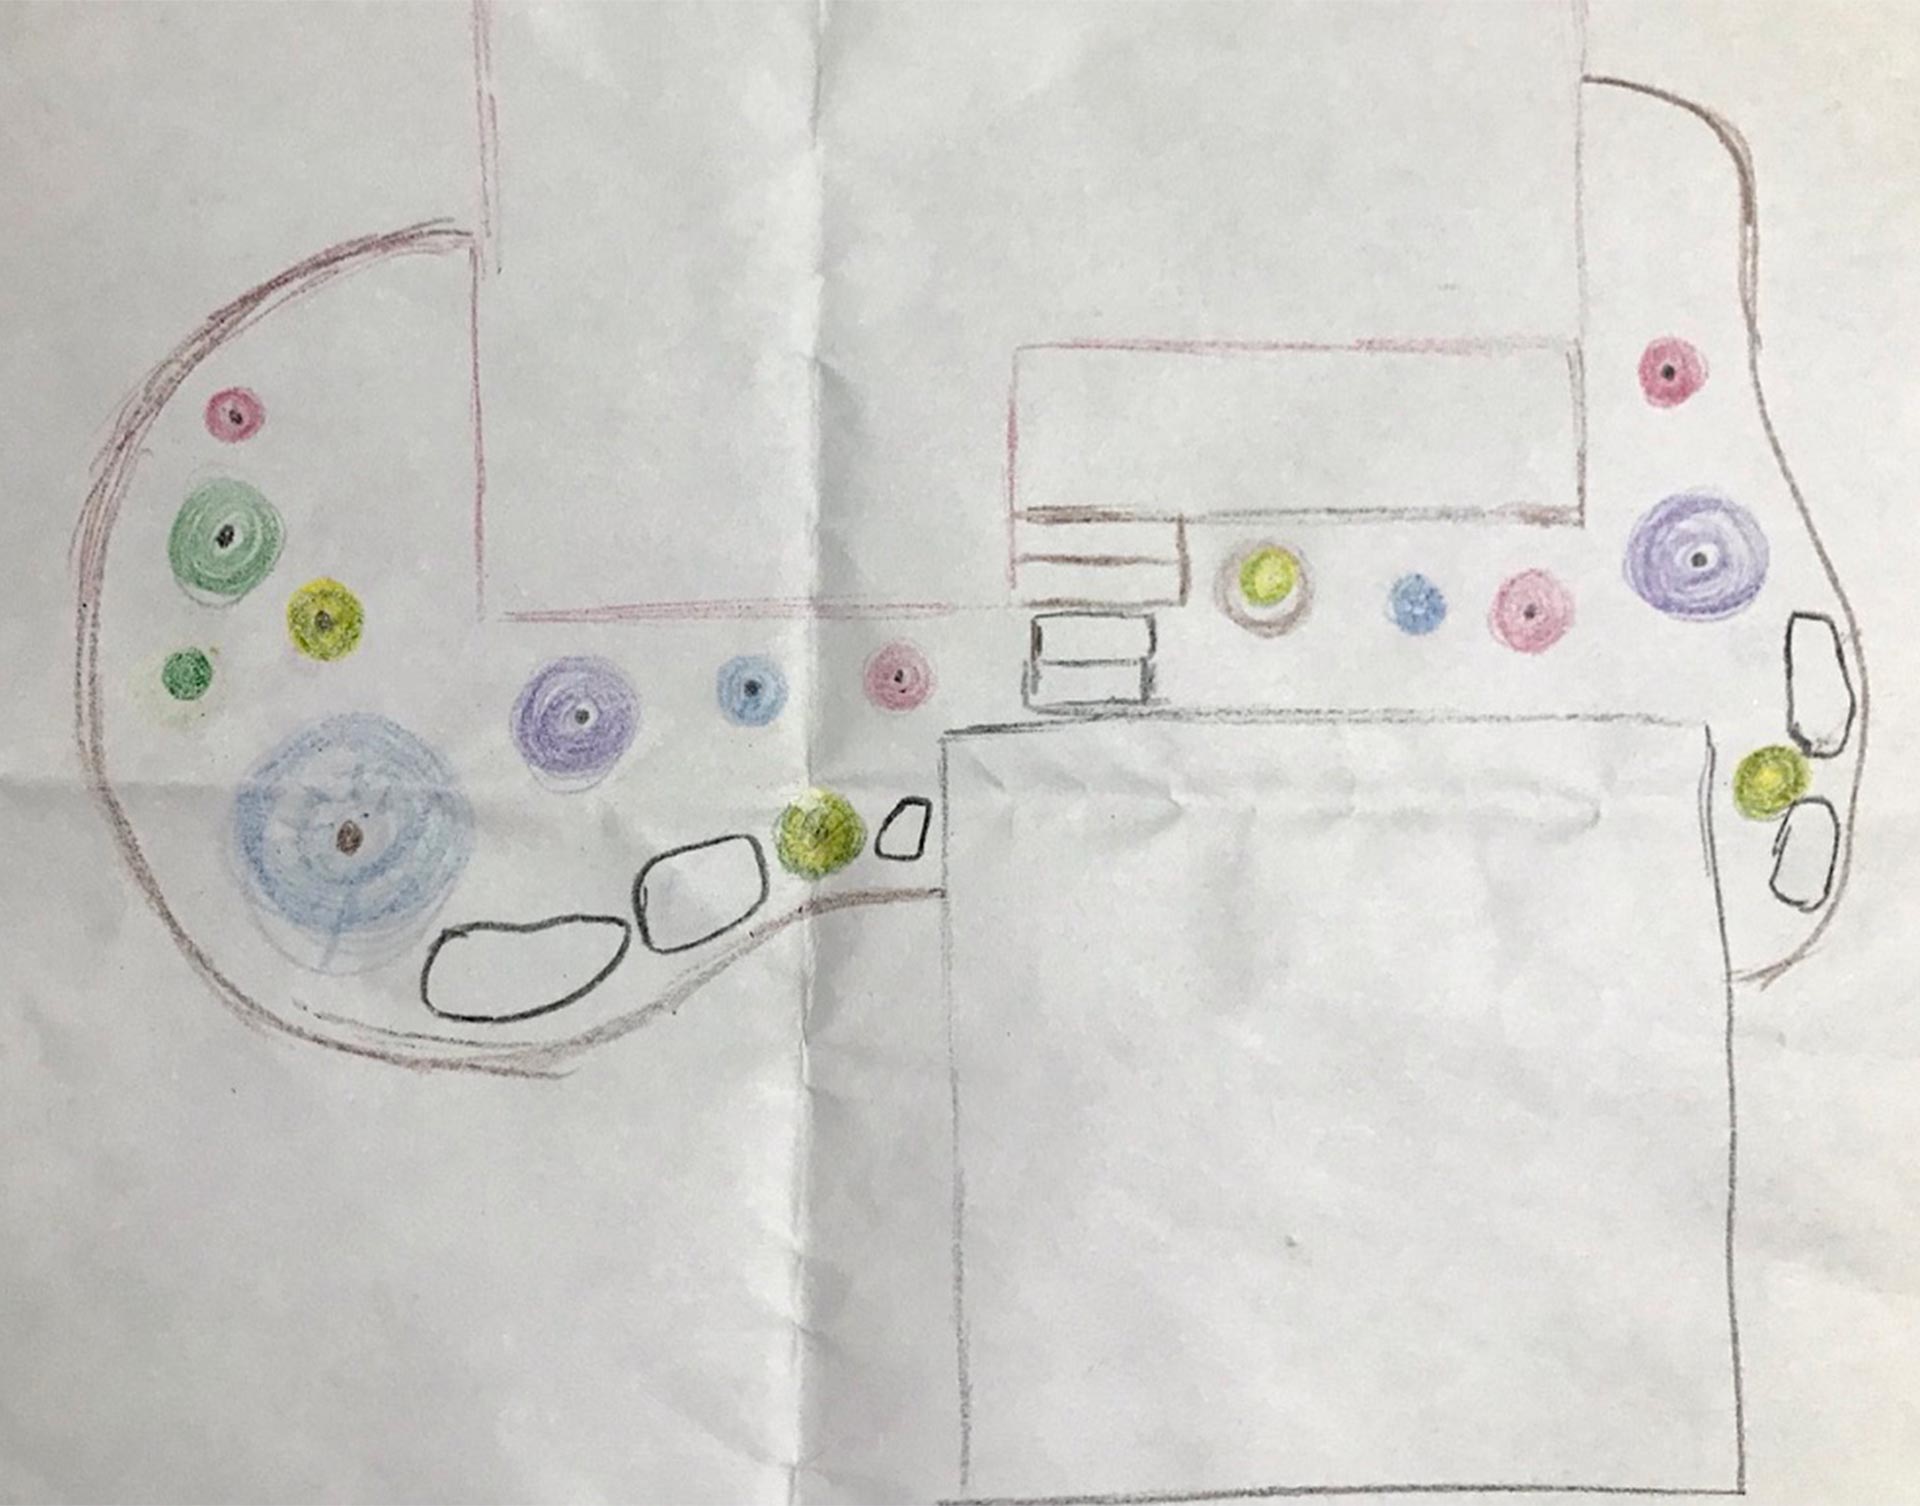
Step 2 - Use A Water Hose or Rope to Mark Lines
The water hose curves easily and gives you a visual reference. Validate with someone you trust that it does look good. Optionally, you can also spray paint the ground right along with the hose for easier digging.
Step 3 - Cover Grass with Cardboard and Dig Up Grass
Before you throw mulch down, cover up the grass with cardboard so it will die out organically. Remove most of the plastic tape from cardboard. It can help to dig out the edges of your landscape bed to have a cleaner edge.
Step 4 - Spread Out the Mulch
2 Yards could take 1-2 hours to spread out. Never underestimate 4 yards. On the positive side, it's a great workout! Enjoy the earthy smell of the mulch and enjoy being outside on this beautiful earth.
Step 5 - Select and Layout Plants
For this step, pay close attention to the spacing. Sometimes in design plants closer together can look like a pod. It's important to give a reasonable amount of spacing so the plants have room to grow! It may look sparse in years 1 and 2, but in year 3 your plants will really start to fill in. Consider using more evergreen plants as they require less maintenance and have color year-round.
Step 6 - Dig Holes and Plant Your Plants
Dig your holes about 2 times wider than the plant. For the depth, instead of digging deep, mound around the plant so that it is fully covered. This is referred to as mounding. Plants usually don't like their roots being in wet soil, so planting higher will allow for better drainage. Also planting trees higher will add more dimension to your landscape by creating hills. There is a saying, "Plant it low and it won't grow. Plant it high and it will grow to the sky."
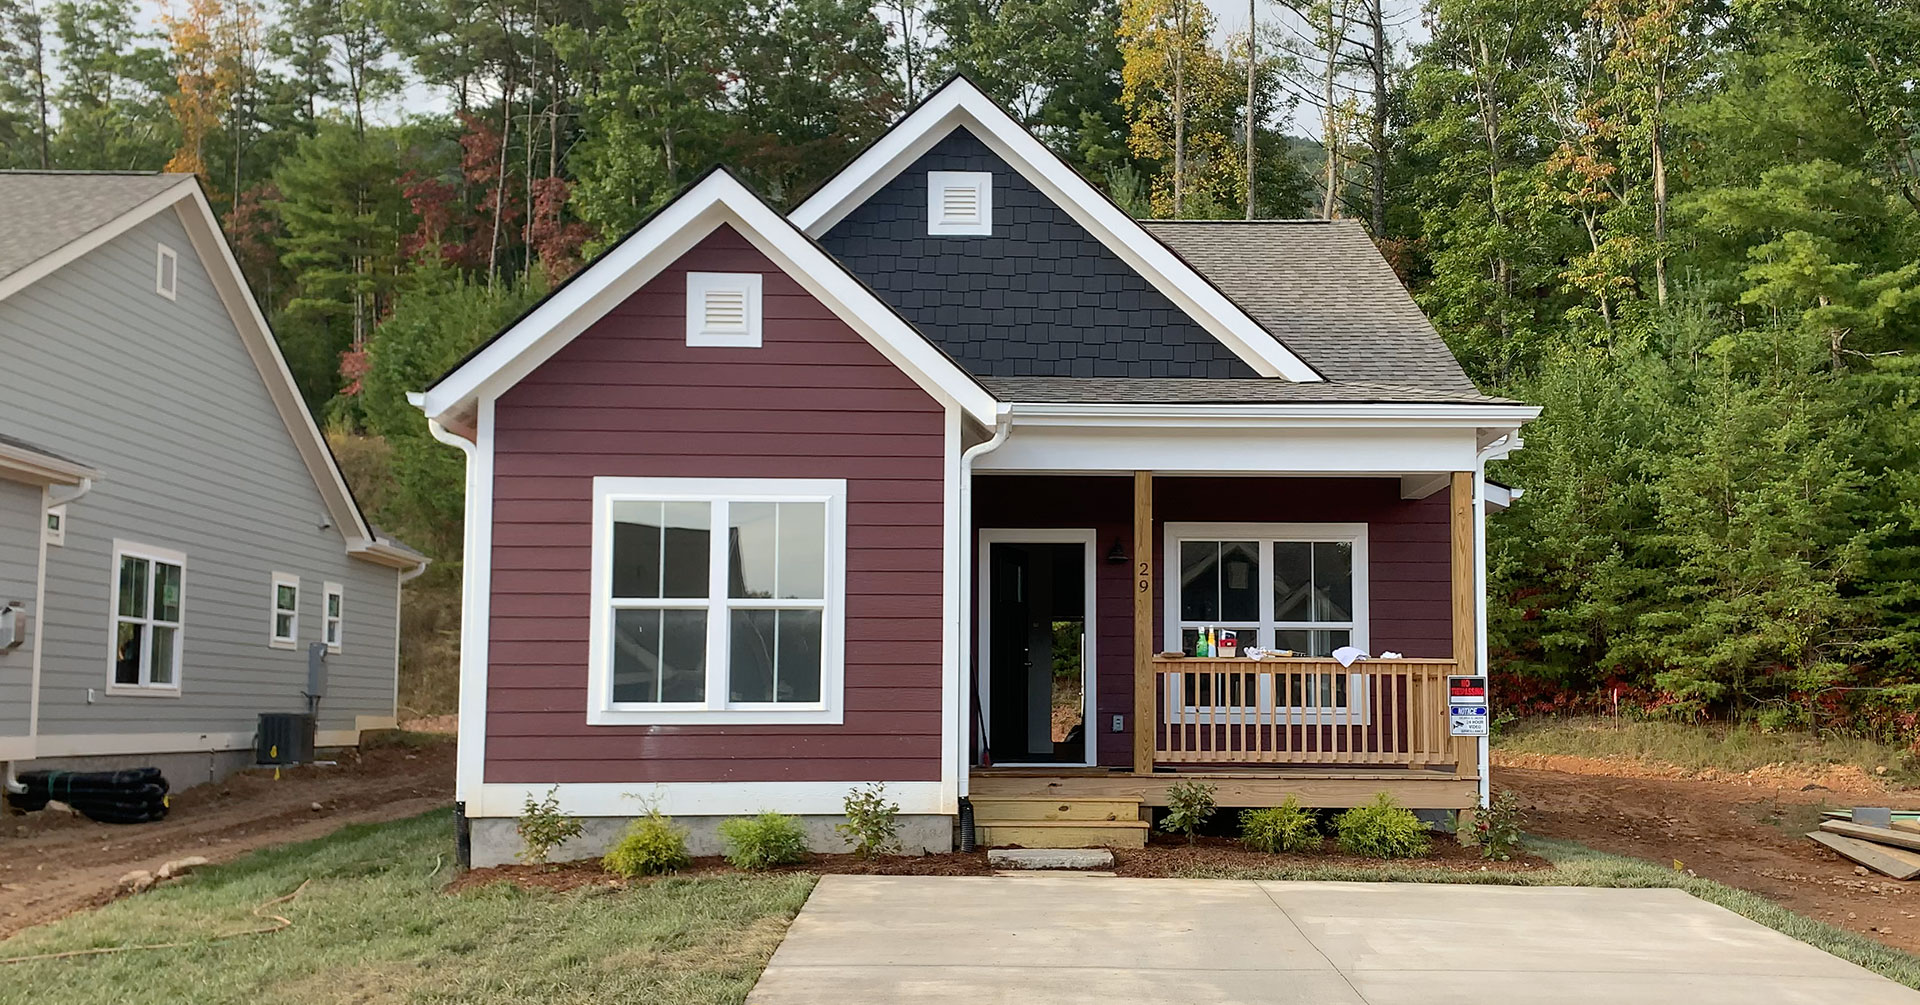
Before - Landscape Picture
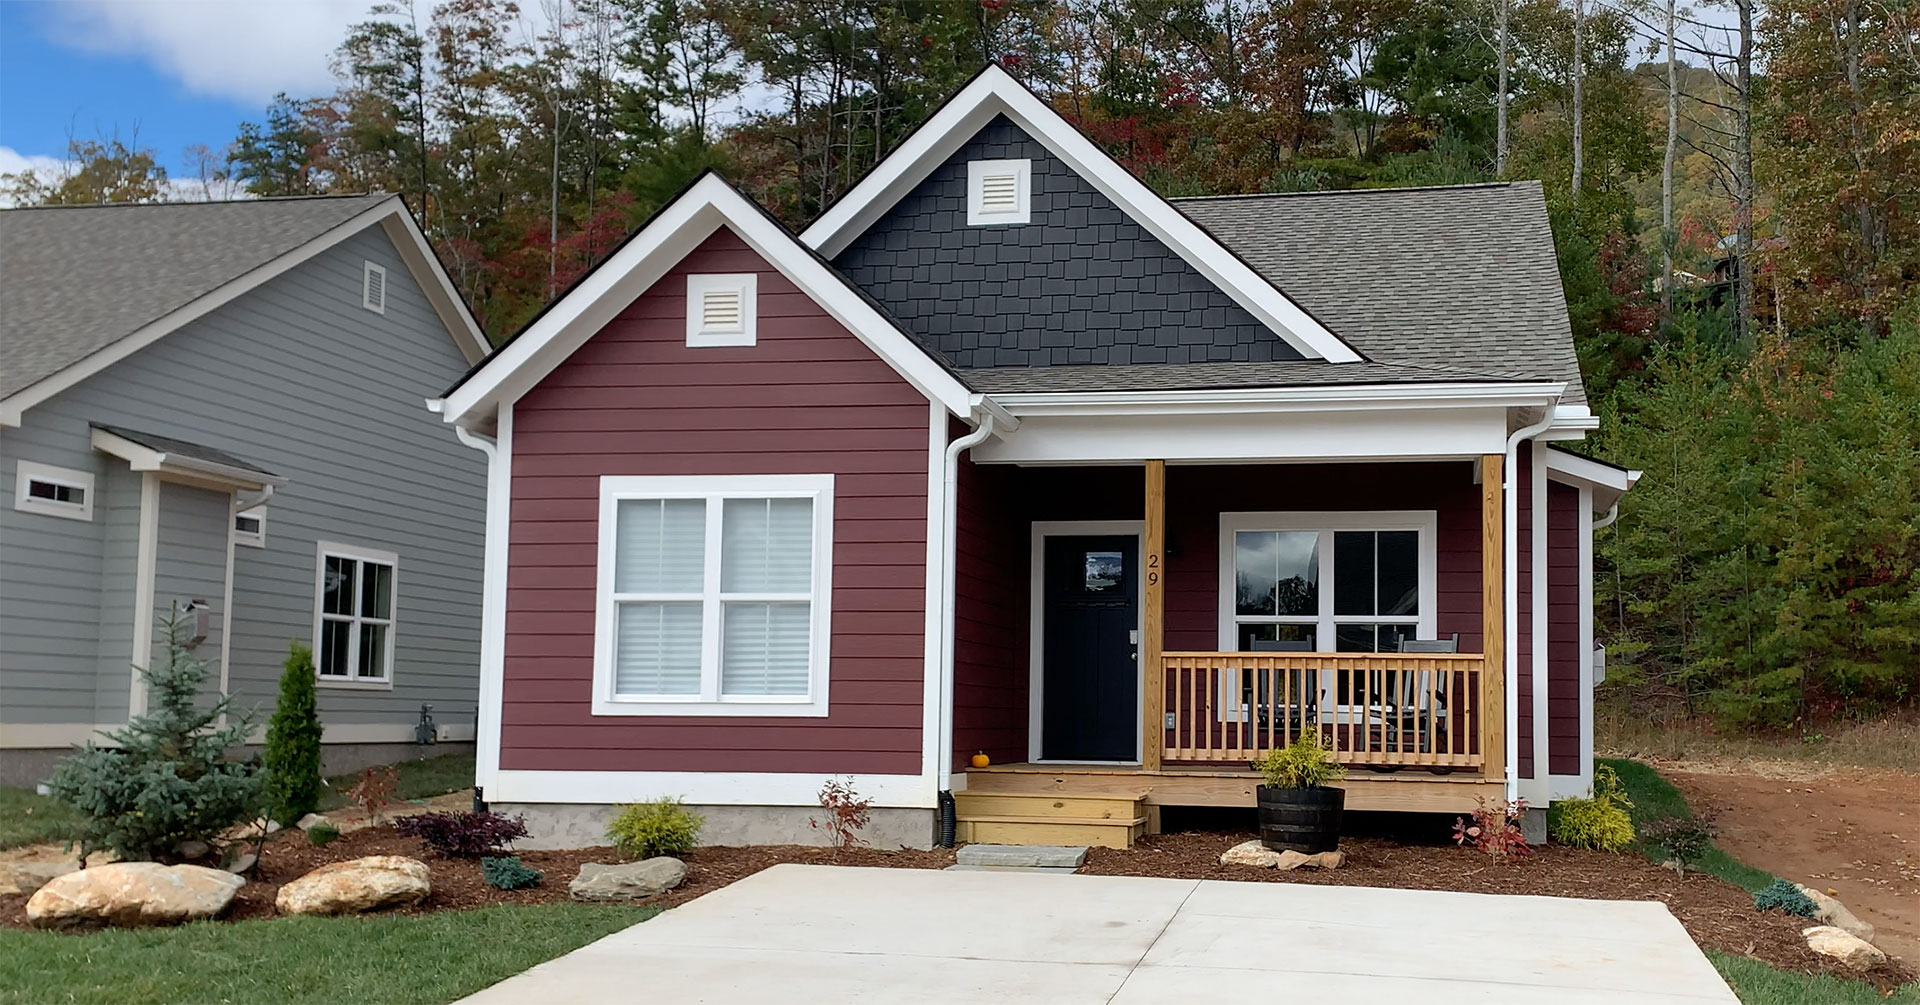
After - Final Landscape Picture
Materials and Price List
For this project, we came in right at $950. All of the plants we purchased are evergreen so we will have year-round color and leaves. The 4 Gardenias, the plants with red leaves, are deciduous.
- Boulders - They were already on site and free
- 4 Yards of Mulch $100 + $100 delivery
- Blue Spruce was the most expensive but it was our specimen tree. Both of us loved it. $250
- 8 of the plants were relocated. Consider re-using the plants you have, just move them to a better location
- The rest of the plants, soil conditioner and wine barrel was $400 + $100 delivery
Plants List
- Blue Spruce (Fat Albert)
- Arborvitae (Emerald Green)
- Loropetalum (Crimson Red)
- Juniper (Blue Star)
- Cypress (Golden Mop)
- Mugo Pine
- Gardenia